Shader X2 Online
GameDev is hosting a free online copy of the ShaderX2 books.
ShaderX2: Introduction & Tutorials with DirectX 9
ShaderX2: Shader Programming Tips and Tricks with DirectX 9
Pilfered from the Real-Time Rendering book blog.
Eric Lengyel’s Projection Matrix Tricks
Eric Lengyel has the slides from his GDC 2007 talk “Projection Matrix Tricks” available online. Included are techniques for formulating a projection with an infinite far plane (useful for rendering distance stuff right by the far plane, such as skyboxes) and clipping against a plane in the scene (useful for things like rendering geometry below a refractive surface).
Volumetric particle lighting
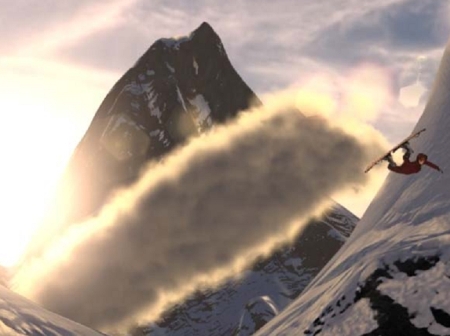
At SIGGRAPH this year, there was a talk by the AMD/ATI Demo Team about the Ruby:Whiteout demo. It was disappointingly attended but it was filled to the brim with GPU tips and tricks, especially in the lighting department. This stuff hasn’t been presented anywhere else and I haven’t seen much discussion on the web so I decided to highlight a few of the key topics.
One of the really impressive subjects covered was volumetric lighting (w.r.t. particle and hair). Modeling light interaction with participating media is a notoriously difficult problem (see subsurface scattering, volumetric shadows/light shafts) and many surface approximations have been found. However, dealing with a heterogeneous volume of varying density, such as the case with a cloud of particles or hair, is still daunting. The method involves finding the distance between the first surface seen from the viewpoint of the light and the exit surface (the thickness), and also accumulating the particle density between those surfaces. Depending on how you decide to handle calculating this thickness and particle density, it could take two passes. They present a method for calculating this in one pass.
By outputting z in the red channel, 1-z in the green channel and particle density in alpha, setting the RGB blend mode to min and the alpha blend mode to additive and rendering all particles from the viewpoint of the light, you get the thickness and density in one pass. This same method can be applied to meshes such as a hair. It should be noted that this information can also be used to cast shadows onto external objects.
The presenters also discuss a few other tricks. These include rendering depth offsets on the particles and blurring the composited depth before performing the thickness calculation discussed above to remove discontinuities. Also, for handling shadows from non-particle objects, they suggest using standard shadow mapping per-vertex on the particles. I think I originally saw this idea mentioned by Lutz Latta in one of his particle system articles or presentations.
I might dredge some other topics from the presentation later on, but eveyone should check out the slides here.
Compute the thickness of an non-convex object
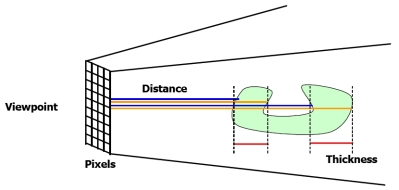
Knowing the thickness of an object can be useful, for things like computing single-scattering of light through a participating media (think fog or a translucent material). The most obvious thing to do is render out the depth of the back faces, render out the depth of the front face, then use the difference between the two as the thickness of the object. This is fine-and-dandy for convex objects, but not so practical for more complicated objects. Look at a simple example of such an object in the below figure. A handy way to compute the thickness regardless of the object is to sum up the depths of all front faces at a pixel, then sum up the depth of all back faces, and subtract. You don’t have to resort to something like depth peeling to get these depths, just turn on additive blending when you render out depth for front and back faces. This was shared with me by my friend Thorsten Scheuerman but can originally be found in the NVIDIA Fog Volume SDK sample.
Linearize Depth
I was just working on something in which I needed linearized depth values. I couldn’t remember how to do this off of the top of my head. Turns out you just take into account w, which makes complete sense now that I’ve seen it (doesn’t it always work that way?):
float4 vPos = mul(Input.Pos,worldViewProj);
vPos.z = vPos.z * vPos.w / Far;
Output.Pos = vPos;
This was poached from Robert Dunlop’s page
Self-shadowing in Bump and Parallax Occlusion Maps
Humus has a great little demo based on Chris Oat’s ambient aperture work . Oat’s stuff was used with terrain lighting in mind, but obviously it can be used on some bump maps also. This is a quick and dirty way to get some self shadowing on your bump mapped/parallax occlusion mapped surface without a bunch of extra texture accesses or aliasing. Oat’s method works by representing the unoccluded part of the hemisphere (the aperture) and the light source by spherical caps ( a direction and arc-length radius) and then computes the intersection of the two. Humus instead calculates the difference between the dot product of the aperture direction and the light direction minus the radius of the aperture. Pretty cool.
Please add this page to your RSS feed if like what you see so far.

